


 русский
 Español
 عربى
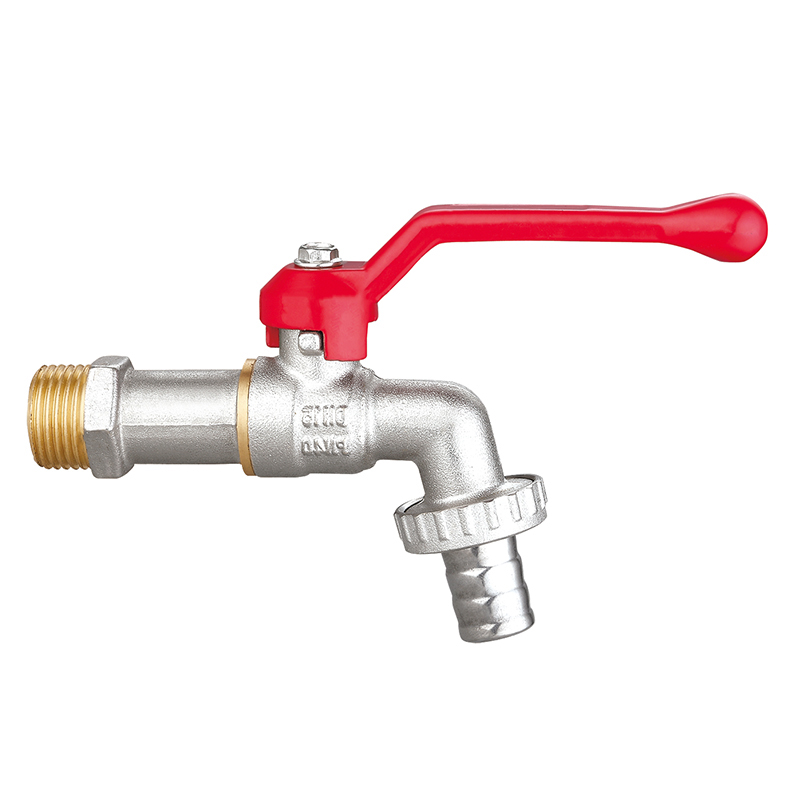
عربىPolished Bibcock: How to Install It Right?
2025-09-12
A gleaming polished bibcock can instantly elevate the look of a kitchen, laundry room, or garden wall, but its beauty is meaningless if it leaks the beginning you turn the water on. Correct installation is the difference between a fixture that lasts decades and one that torments you with drips and corrosion. Follow the sequence below and you will finish the job once, finish it right, and never have to think about it again.
Prepare, sweat later
Begin by shutting off the main water supply and opening a nearby tap to drain residual pressure. Lay a small bucket or towel beneath the work area; even a few hidden drops can mar cabinetry or drywall. Unbox your polished bibcock and inspect the threads for factory burrs or transit damage. If you spot any nicks, smooth them gently with 400-grit wet-and-dry paper so the finish remains flawless.
Choose the right connector
Most modern bibcocks are supplied with male ½-inch or ¾-inch BSP threads. Match the connector on your pipework—copper, PEX, or galvanized—and pick a compatible female fitting. If you are tapping into an existing copper line, a compression elbow is fastest; if you are threading onto galvanized iron, use a galvanized coupler to dissimilar metals and prevent galvanic corrosion that will pit the polished surface.
Seal like a professional
PTFE tape remains the easiest sealant, but technique matters. Wrap clockwise, three full turns, stretching the tape slightly so it beds into the thread valleys. Do not wrap the two threads nearest the spout; excess tape can shred and migrate into the valve seat, causing leaks. For extra insurance, add a thin smear of non-hardening pipe dope over the tape. When tightened, the compound fills micro-gaps that tape alone cannot reach.
Tighten, but do not over-tighten
Hand-tighten the bibcock until the threads catch, then use a smooth-jawed wrench for an additional half-turn. Polished brass or stainless steel is softer than you think; over-torquing can oval the inlet and create a permanent weep. Hold the faucet body steady with a second wrench to prevent twisting the spout away from its intended orientation.
Anchor the fixture solidly
A loose bibcock wiggles every time you attach a hose, slowly loosening the joint and marring the wall. If you are mounting to masonry, drill a 6 mm pilot hole and use a plastic wall plug plus a stainless screw. For timber cladding, drive a 32 mm galvanized screw directly into the stud. Before final tightening, slip a rubber or nylon washer between bibcock flange and wall; this isolates vibration and keeps the polished backing ring from scratching.
Pressure-test immediately
Restore water gradually while the bibcock is in the closed position, then open it fully and watch the joint for three full minutes. Even a pin-head seep will grow under line pressure, so catch it now. If you see moisture, tighten an extra quarter-turn or disassemble and re-seal. Once dry, cycle the handle ten times; smooth operation confirms the valve seat is seated correctly.
Protect the finish last
Wipe fingerprints away with a microfiber cloth dampened in warm water, then dry. Avoid abrasive pads or citrus cleaners that can micro-scratch polished surfaces. A single drop of mineral oil on the spout threads will keep them looking showroom-new and make future hose removal effortless.
When the polished bibcock is anchored, sealed, and tested, you have not just installed a tap—you have installed confidence.


Contact us
Whether you want to become our partner or need our professional guidance or support in product selections and problem solutions, our experts are always ready to help within 12 hours globally.
INQUIRY NOW
CONTACT


- ADD: Small and micro industrial points, Yungang Village, Chumen Town Yuhuan, Zhejiang, China PC:317605
- E-mail: [email protected]
- Phone:+86-13586173881
Copyright © Zhejiang Yuhuan Shuangwei Copper Products Co., Ltd. All Rights Reserved.
Valve and Pipe Fitting Company
